Monday, 20 October 2008

Wedding card


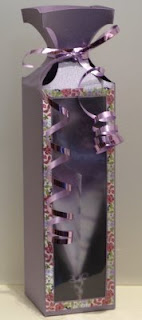
Designed using the Cricut wedding cartridge, I was requested by a friend to make this for her son, the design is simple yet effective. I joined 2 bows together to give the card that expensive look!!

Tuesday, 7 October 2008

Card portfolio

I had to share this with all: I was approached by one of my work colleagues to provide him with a portfolio of a variety of card samples, for him to take with him back to London - to show not only members of his church who he thinks will love them, sending them to their families in different countries; but to special boutique shops specialising in hand crafted gifts.

He was impressed with the recent cards that I have made for colleagues moving on to better things, and told me I was in the wrong profession!!!

I took his comments but beleive I'm equally good at both my job and hobby! I am considering his offer to make a selection of cards just to see what the reaction would be!!

Well, it wont hurt!!

Thursday, 2 October 2008

Won an Award! WoooHooo!!!


I have received an award from Tina check out her blog thank you so much, http://tinascraftycards.blogspot.com/ I'm quite overwhelmed.

Here are the 6 rules;
1. The winner can put the logo on their blog.
2. Link the person you received your award from.
3. Nominate at least 5 other blogs.
4. Before listing the nominees give a brief reason why you chose them.
5. Put links of those blogs on yours.
6. Leave a message on the blogs you have nominated.

I love to have a look at the following blogs as the ladies are so talented and they're an inspiration to all, so very helpful and generous. Thank you ladies.


1. Jen at http://www.jensbrainthings.blogspot.com/
2. Lillie at http://d-swat.blogspot.com/
3. Sandra at http://www.ab-imo-pectore-.blogspot.com/
4. Spartansus at http://spartansusscraper.blogspot.com/
5. Lynn at http://beautifuldelightsblog.blogspot.com/

Thursday, 18 September 2008

R.I.P Cricut Expression!

My Cricuit Expresssions has died (R.I.P), I cried, I've only had it 4 weeks - a late birthday pressie.

My story....It cut out the leaf card I put together on DS perfectly, but when I went to reload it to cut out the insert sheets, there was no power. I simply thought that it turned itself off, but I hadn't taken that long! I started it again, the green light glowed around the on button, but there was nothing else, no boot-up etc.

Gutted!!

But it's not all bad news, because I bought this machine where my sister works, and they are going to order in another and do a straight swap, it is however the first expressions they've had gone faulty. My bacon's saved, but I have to wait three weeks for my weekend off to come around again to drive the 200 miles to my mum's to carry out the exchange! Good job baby bug is here, therefore creativity lives on, in smaller designs!

Sunday, 14 September 2008

Sorry UR Leaving Card


Designed on DS using Storybook and Speaking of fall, fits into a 5" by 7" envelope. I made this card for a colleague who will be starting her new job/role working in the community. Wishing her all the best.

I have included the cut file for downloading simply click on the title.

Tuesday, 9 September 2008

3D High Chair 100% Cricut


I designed this highchair on the DS using George and Basic Shapes and Street Sign cartridges, the ideal gift for a new born.

To download the cut file simply click on the title.

Friday, 5 September 2008

3D Parasol Card


I made this to show how the parasol looks on a card. I have show 4 pictures so you can see how it looks from all angles. This parasol was cut at 3 inches, cut pattern available by clicking on the title, and the skewer cut at 5.5 inches.

Rainbow Photo's............


While out in the garden on Wednesday 3rd September-cutting the grass as one does, when you can!!! The weather couldn't make its mind up! we had a couple of mild showers followed by strong sunshine. I just had to take a picture of this rainbow as the colours were so striking against the darkened sky.

Seeing a rainbow has always made me feel good on the inside from a young lass, it's like the calm afer the storm!

Sunday, 31 August 2008

3D Parasol and Carry Case


I designed this file after seeing a picture of the Arty Farty template for the parasol, but why spend money on buying these templates then having to cut it out by hand, see where I'm going? Makes no sense when you have a cricut!!!! I studied the picture long and hard and eventually I got something like it!!!

This particular creation took a lot of tweeking and many failed attempts until I got the cut just so! This can be presented to others on many occasions, birthdays, get well etc...and not just as a 3D object but upon a card! Point 17 of the instructions.

Sorry about the box, it is supposed to be clear to see through but I have ran out so decided to cut up a laminate pouch!! - gives it the authentic look!!!

The cut file is available to those who want it, just click on the title! Have fun!

Parasol Instructions

Items you will need:

• Cricut (12 x 12 mat); Design Studio with George ‘n’ Basic Shapes cartridge.
• Card of your choice/or printed vellum
• Craft Knife
• Scissors
• Glue/double sided tape/clear sticking tape
• Beads with large holes (knitting beads are ideal!)
• Lace/ribbon
• Other embellishments of your choice.

Instructions

1. If the cut has been downloaded and you’re outside of the UK, please go to the control panel on your PC and change the regional language/location from English/UK to your own.

2. Cut the file out as you would normally (required design studio and Cricut cutting machine).

3. Before creasing along the lines indicated in the cut file, you need to add strength to the card/vellum do this by placing clear tape 10 mm from the tip of the crease line up the crease line, on both ends; you will need to refer to the cut file to see where the lines are.

4. Now crease the hood of the parasol in a fan like motion (concertina) as indicated by the crease lines, start at the end without the tab/flap. Shorter edges of the right side of the card/vellum should be facing towards you, if you happen to have the longer edges facing towards you then just refold going in the opposite direction.

5. Open the hood of the parasol out now and fold flat.

6. Decorate the curved edges of the hood with ribbon/lace over lapping the longer edges. Ensure these are level, turn it over and neaten with scissors (Please note that note peel offs adhere neatly!). Add a little clear tape on each end of the crease line to add strength. stick it together, neaten the edging with a creasing/blunt tool.

7. Either use double sided tape or quick set glue (pergamano is the glue I use!) and place on the tab/flap – right side. Stick the edges together, this should now resemble a cone shape! I said should!!!

8. Place a little blob of glue on the inside of all the small edge creases and gentle pinch these together to adhere; now it should! Start to resemble an arrow head shape.

9. Now you require a wooden skewer/thin rounded stick with a pointed end-measuring 210 mm in length. Make a couple of marks with a pencil, one at 30 mm and another at 95 mm, measuring from the pointed end using a pencil.

10. Cut 2 x 24 mm wide double sided tape at 50 mm, roll this around the skewer on the right side of the mark made at 30 mm-keeping it on top of itself! Forming a band. Repeat at the second mark (you can use wet glue if you wish, optional!!).

11. Push the pointed end of the skewer through the parasol hood until 5 mm of the tape is showing; now pinch the parasol base to adhere to the tape.

12. Take a bead with a large hole and push this over the pointed end of the skewer, the tape will adhere to it; optional-add a little wet glue around the bead to add a little more strength!!! To keep the bead fixed in place.

13. As point 8; but with the larger edges at the top and with the skewer central, pinch the edges together.

14. Place 4 large holed beads onto the skewer; adhere to the opening of the parasol and add a little wet glue to secure in place. Now cut another 24 mm wide double sided tape at 50 mm, roll this around the skewer on the end of the skewer, forming a band, move the beads up onto the tape and add a little extra glue to secure into place; add a further bead to the top end of the skewer, fixing it in place with wet glue.

15. Now it’s time to embellish away!

16. Make the presentation box.

17. This parasol can also be opened out flat and adhered to a card. You will have to make a card box though to present it this way.


Tips

1. Before gluing your cuts, if you have a cuttlebug, dry emboss them or with any other dry embosser!!

2. Again if you have Pergamano tools, prick a design into the paper/vellum before assembly.

3. Use 3D liquid pearl paint and apply stickles to give your work dimension.

4. Admittedly there are thousands of embellishments you can use to decorate these e.g. lace; ribbon; buttons; glitter/glues; whatever you can lay your hands on really.

5. For the really heavy embellishments, use strong glue ie: hot glue gun to secure fixture!!!

6. Happy crafting and enjoy your cut file.

Saturday, 30 August 2008

Leaving Card


I made this leaving card for a colleague who is about to return to study to become a fully qualified doctor of psychology, she will be sadly missed as she was part of a multdisciplinary team, where everyones input is valuable. The card was designed on DS made using Paper Dolls; Thinking of Fall; and Story Book.

I originally designed the card using the wording from Pooh Bear font; but decided at the last minute that I would use stick-ons instead. To embellish I have added brads, ribbon, adhesive stones and did a little doodling!

I have added the cut file incase anyone would like it!! Just click on the title.

Thursday, 21 August 2008

Gracie had to play too!


Gracie had to show Alyssa and Paris how 'your' supposed to play with sand! Which they all seemed to enjoy!!! As you can tell they all had fun!

Tuesday, 19 August 2008

Masculine card in previous post-cut file.


Designed on DS using George and Basic Shapes Cart. The cut is not 100% perfect, I simply trimed the edges a little! I have changed the cut file slightly from the card, made the shorts bigger!.

Fun cut file.. Enjoy download it by clicking on the title.

For the ladies who like a six pack!


I replicated this card after seeing one, on Valita's blog, check it out by clicking on the title.

Designed using the cricut and DS, using George and Basic Shapes cartridge.

Monday, 18 August 2008

Onsie cut file take 3!


A different take on the onsie cut file previously posted.. To download this cut file simple hover and click on the title.

Sunday, 17 August 2008

Milestones Word Book- Cut File


I designed this word book in preparation to complete for my Daughter, over coming many mile-stones in her life, from first word/walking to first day at school! so on..........

To Download this file just hover and click on the title.

Saturday, 16 August 2008

Diamond Fold 'Hello' card


Made using the same technique as my last card, forgot to mention, this card folds down to fit into a square envelope.

First Christmas card, it's a cracker!


Being pleased with the results from my card in the previous post, I saw another Diamond fold card on You tube, cricut was used only to cut out the squares and rectangles.

Just click on the title and you'll go straighgt to You Tube, for the tutorial on how to make this card.

Friday, 15 August 2008

Many folds-Happy Birthday Card


I made this card for my daughters friend, whose having her 6th birthday tomorrow. Alyssa is so looking forward to her party-she definitely has a better social life than I do!!!!!!

My Sister Shell showed me how to make this card after she saw it in a The Making Cards craft magazine, only available in craft shops here in the UK.

Instructions to make this card

1. A4 piece of card, leave the length but measure and cut the width to 18 cms, and mark on the reverse side of the card at 9 cms (to score down length).
2. Length, measure on the reverse side-each edge at the following intervals, 9 cms (to score across width); 8.5 cms (guide only); and again at 15.5 cms (guide only), the later 2 are to make the valley/mountain folds in the card.
3. Score both in the length and width at the 9 cm markings.
4. Use a ruler and place it on both the 15.5 cms measurement on one edge and on the 8.5 cm on the other edge, score from the 15.5 cm mark to the middle only. Repeat on the other edge.
5. Bend the mountain folds upwards, with the wrong side of the card facing you.
6. You now have the template to make the card how you would like it, remember to rub out the pencil marks!

Friday, 8 August 2008

Graduation memory card


Made using the template from my previous post, this was made for a work colleague who's future daughter in law has passed her university degree. It is a memory card, and once she has had a photo she can place this into the pocket in the last picture.

Monday, 4 August 2008

Pop-up Graduation card


I made this card after watching the following:

http://uk.youtube.com/watch?v=rEATR6r1kYw&feature=related

Using the design studio and both Locker Talk and George, Basic shapes cartridges the following is my take on this card. I designed the tassel myself using silks, looks a little better than string! To download the cut file just click on the title.